Identifying Quadrilaterals
The purpose of this activity is to revise or learn about different types of quadrilaterals and their different properties. Working with the computer brings in a fun element (data entry), but above all, allows us to see and analyse together the students’ mistakes. If we don’t wish to delve deeper into AI and machine learning, we can stop there. But it is interesting to go further: the computer can form rules on its own that we can observe and test. Doing so, we can see how a model created from data that is partly incorrect is (typically) also partially flawed itself.
Introduction
In the introduction, we revise some different types of quadrilaterals (we can draw them on the board, the students can draw them themselves etc.) and simultaneously revise the properties that define them (pairs of parallel sides, right angles, and so on). We try to bring the students to come up with rules for distinguishing between these shapes. We can also write these rules down.
We then ask the students if they think the computer could figure out these rules by itself, if we showed it enough examples of different types of quadrilaterals.
This activity can be done even if the students are not yet familiar with quadrilaterals. We can, for instance, start by asking them to describe a rectangle. If they say »it has two pairs of sides of equal length«, we can draw a couple of examples of such »rectangles« on the board, among them also a parallelogram; we then give it some time for the students to object, and once they do, ask them to come up with a definition of a rectangle that is more precise.
It’s a good idea to leave the drawings of the shapes on the board so the students can see and look at them, in this way helping them make fewer mistakes.
Please keep in mind that the activity that follows takes at least half an hour. In case we are limited to 45 minutes, we need make sure we don’t spend too long on the introductory part.
Preparing the Data
We divide the class into 5-6 groups. Each group will be asked to classify a number of the quadrilaterals from the collection.
We then open the web page for data entry: we enter the number of student groups on the page https://data.pumice.si/quad. After clicking on the button Create Activity Page, we get a link for entering the data. We enter the link into the devices (tablets, computers) that the students will use to enter their data, or we can leave this part to the students themselves. Each group of students should also come up with a name for their group, and then enter that name in the bracket on the newly opened page. If we want, we can also name the groups ourselves or set some rules for choosing a group’s name, for example that they should be named after animals, e.g. badgers, wolves, and so on.
On the following data entry pages, the students will need to enter the quadrilaterals’ characteristics and names. We tell the students it is important to always enter the most specific name for each shape. For example, if the shape is a rectangle, that means the shape name they should enter is a rectangle and not a parallelogram or a trapezoid, even though every rectangle is also a parallelogram and a trapezoid.
Observing the Errors
We open the collected data in the File widget by entering the link we get on the page into the URL field. (If you forget it: it is the same link on which students entered the data, just add /data at the end). If you are reading this at home because you want to practice, enter the URL of the page with simulated data, https://pumice.si//en/activities/quadrilaterals/resources/quadrilaterals.tab.
The resulting table (if we want to view it, we connect File to Table) is in this format:

The “shape” column contains the students’ answers, the “correct shape” column contains the correct classifications of the shapes. The “group name” column indicates which group classified a particular shape. The columns that follow contain the properties of the shapes.
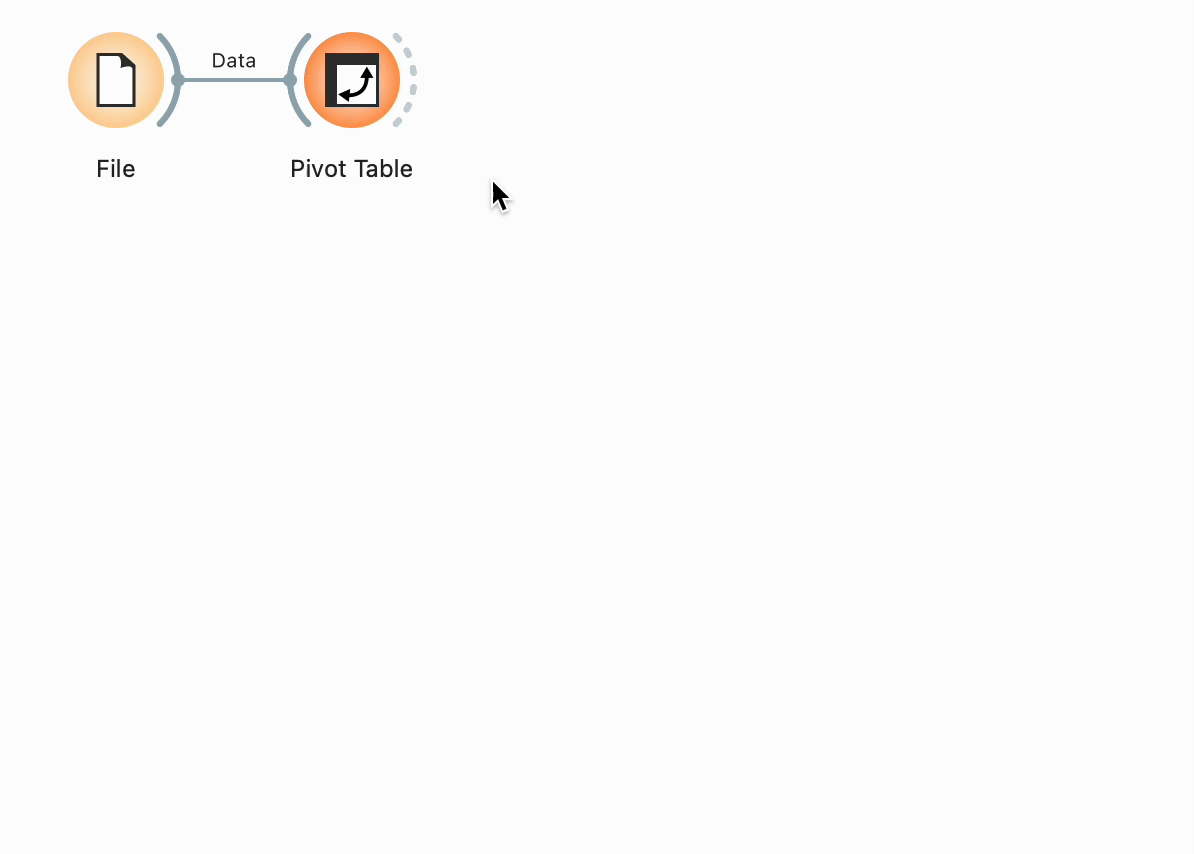
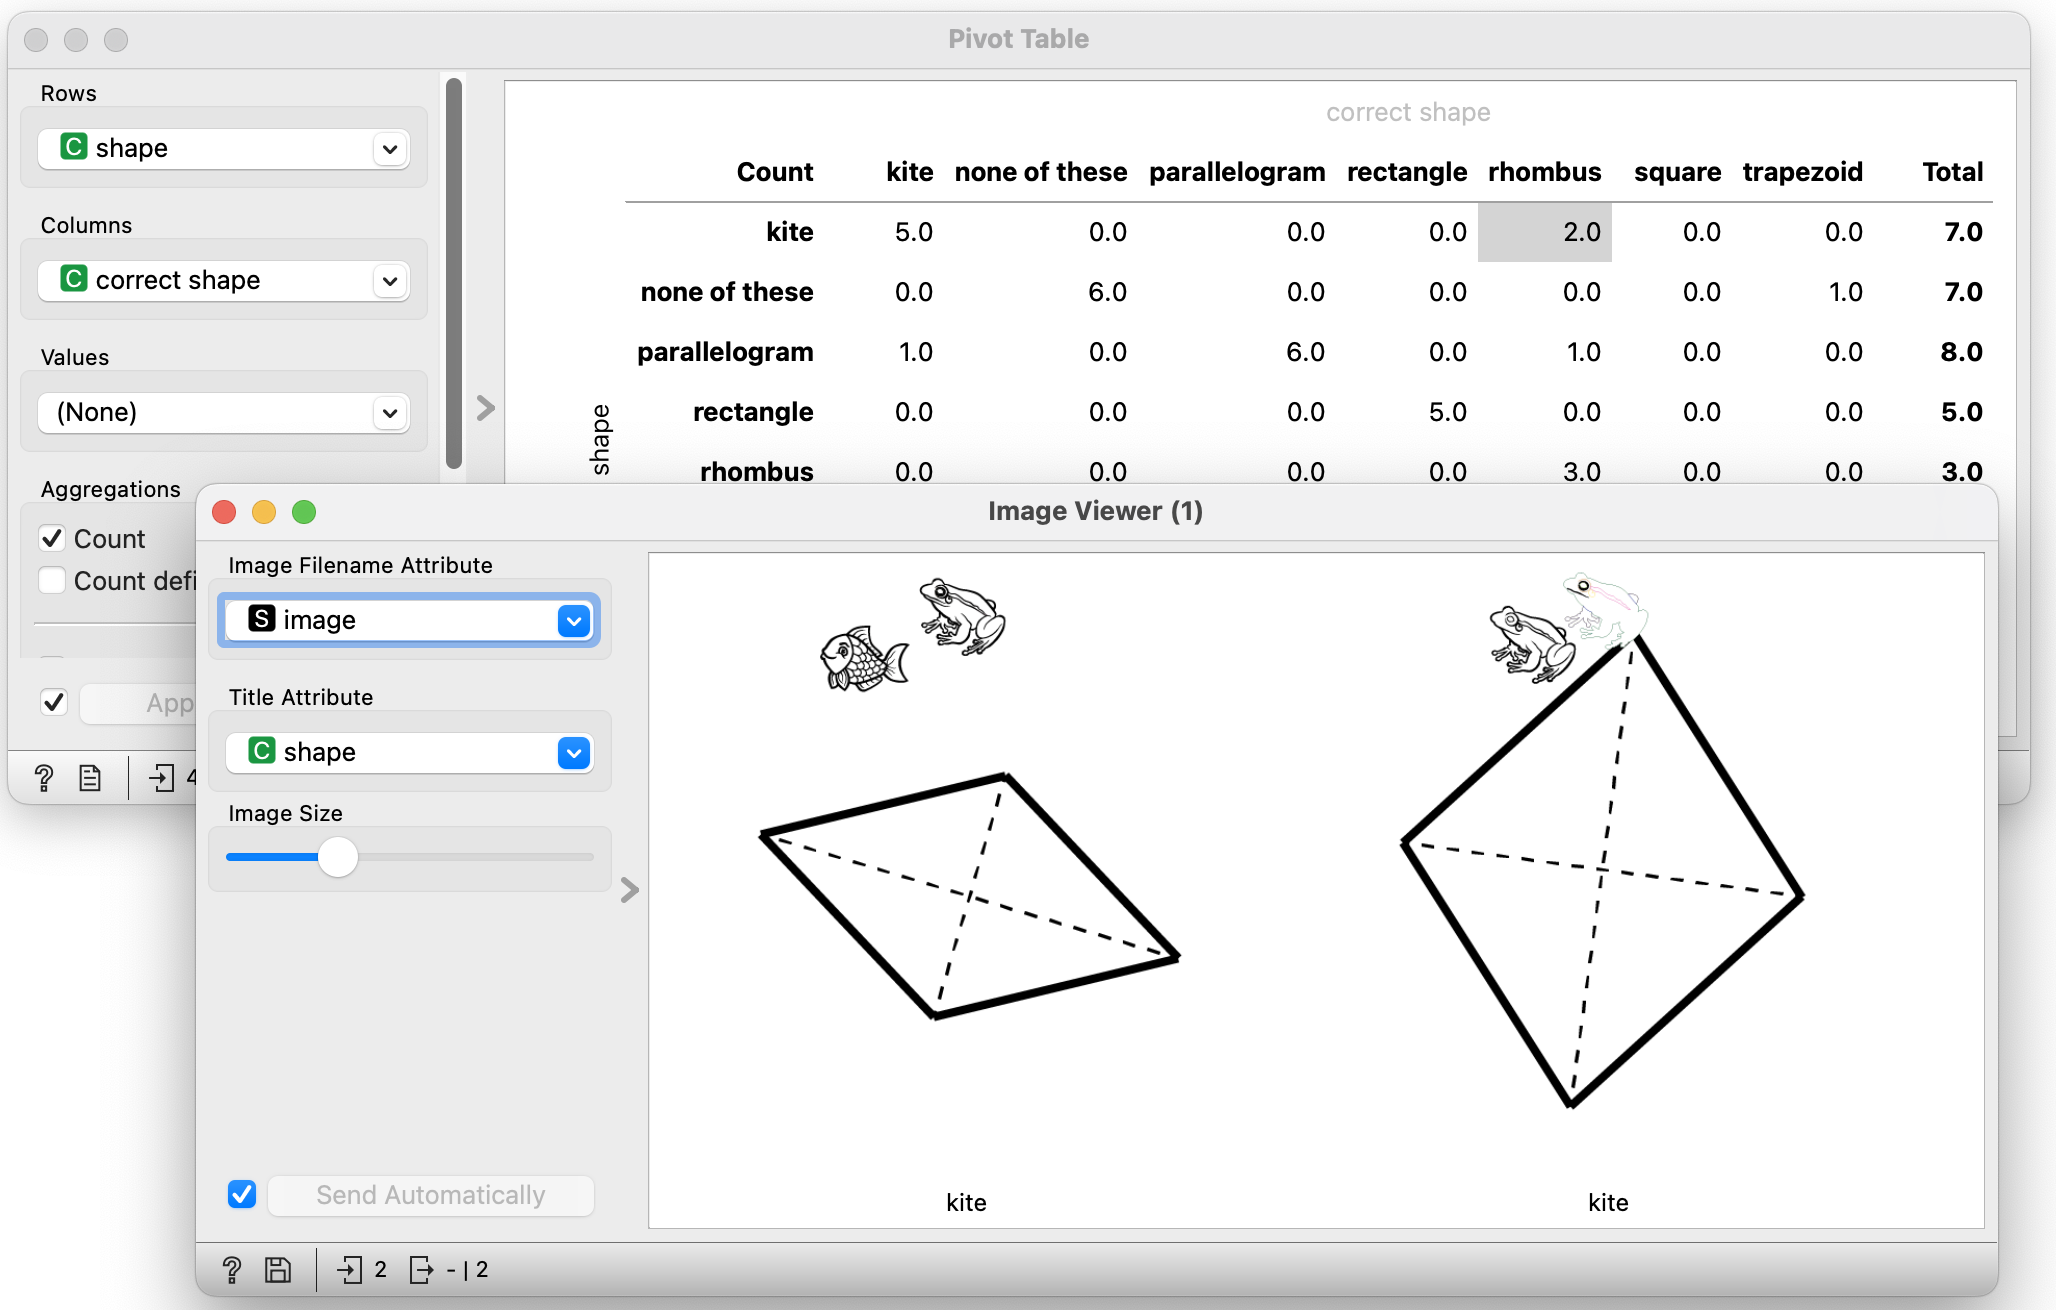
It would be interesting to see which shapes the students got wrong. To do this, we connect the widget File to the widget Pivot Table. In the Pivot Table, we set Rows to »Shape«, and Columns to »Correct Shape«. In this way, we will be able to see where the students have made the most mistakes.

The table above, for instance, tells us that two rhombuses (or rhombi) are incorrectly classified as kites (highlighted cell in the picture). Moreover, one rhombus has become a parallelogram (the cell three rows lower), while one rectangle has become a square. One trapezoid has not been identified as anything, and one deltoid (or kite) has been labelled as a parallelogram. Meanwhile, all the numbers on the diagonal represent correct shape classifications.
Seeing the mistakes is definitely interesting. We connect the widget Pivot Table to the widget Image Viewer. The Pivot Table widget has multiple outputs. The default one is Pivot table (a table with the same numbers as displayed by the widget), but since we are interested in displaying the data that we have selected in the table, we need to connect the output Selected Data.

When we now select a cell in the Pivot Table, we can see the corresponding images in the Image Viewer. If we also set the Title Attribute to Group, we will also see which group made a mistake. We can then challenge that group to find the error. In the image below, we can see that the group called »Squirrels« doesn’t recognise rhombuses (perhaps because in these images, they’re not drawn in a way where a pair of sides would lie horizontally?) and has »degraded« them into deltoids.

We can also connect the Pivot Table widget to the widget Table (once again, make sure to not forget to also set the connection of the signals accordingly!), and in this way, see the data for all the shapes we have select in the Pivot Table that had been entered by the students. Doing so, we can explore whether apart from the shape name, they also got any of the shapes’ properties wrong.
Building the Decision Tree
We connect the File widget to the Tree widget, which is the widget that builds a tree. In the Tree widget, we uncheck all the boxes. (These selections stop the tree construction process once the algorithm starts to run out of data to form new rules reliably. In the present case, however, we disable this function, since our data is insufficient anyway. Besides, it is precisely the errors in the tree that we are interested in.)

A perfect tree would look like this:

However, since the students will almost certainly make some mistakes in describing and classifying the shapes, the tree constructed from their data will most likely look a lot more complex and irregular. That is great though, as it gives us the opportunity to observe the connection between the students’ errors and the resulting model.
It is important that we explain to the students how to read the tree, and check if it correctly describes the different types of quadrilaterals. For instance: if a shape has two pairs of sides of equal length, but doesn’t have two pairs of sides that are parallel, it is a kite.
That said, if the tree constructed from the students’ data is so inaccurate that it becomes useless, we can build a tree from data that is more accurate:
- One option is going to the File widget and looking for »Shape« in the little table at the bottom; there, we click on »Target« and change it to »Meta«. Doing this, we get a tree built from the correctly classified shapes, whose characteristics however are still the same as those entered by the students. If the students for example forgot to enter the information that a particular rectangle has right angles, we will see that a tree branch that contains shapes with non-90-degree angles will also contain a rectangle.
- Another option is to use the data from https://pumice.si//en/activities/quadrilaterals/resources/quadrilaterals-correct.xlsx, which will result in a tree like the one in the image above.
We can show the students some new shapes (or draw them on the board) and ask them to identify them. We use the tree to help them determine the shape type.
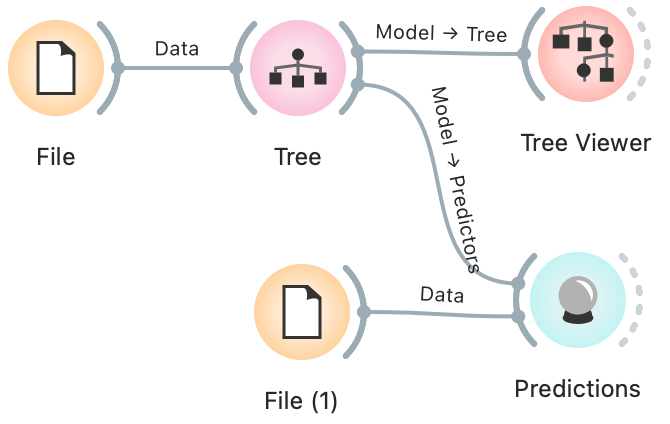
Optionally, we can also show the students how a computer uses a tree to make predictions. We place a new File widget on the canvas, and import into it some data about a number of different quadrilaterals (( https://pumice.si//en/activities/quadrilaterals/resources/quadrilaterals-unknown.xlsx)). We connect this new File widget to the Predictions widget, so that the latter will be able to determine what types of shapes this new data contains. The Predictions widget also needs a prediction model, so we connect it to the Tree widget.

We now open the Predictions widget and … check the shape descriptions and predictions. Are they correct?

It is recommended to repeat this exercise both with the data prepared by the students and with the correct data (the second option from the list above). If the students’ data contains too many errors however, it obviously makes more sense to only use the correct data.
Observing the Errors in the Tree
The tree constructed from the students’ data could look similar to this (in the image below, the tree is built from a simulation of inaccurate data):

Some rules are clearly wrong: on the very right, we can see that there are six shapes that have right angles and two pairs of sides of equal length (notably, in the form, the latter option is mutually exclusive with the option where all sides are equal), but one of the shapes is a square. This is of course incorrect.
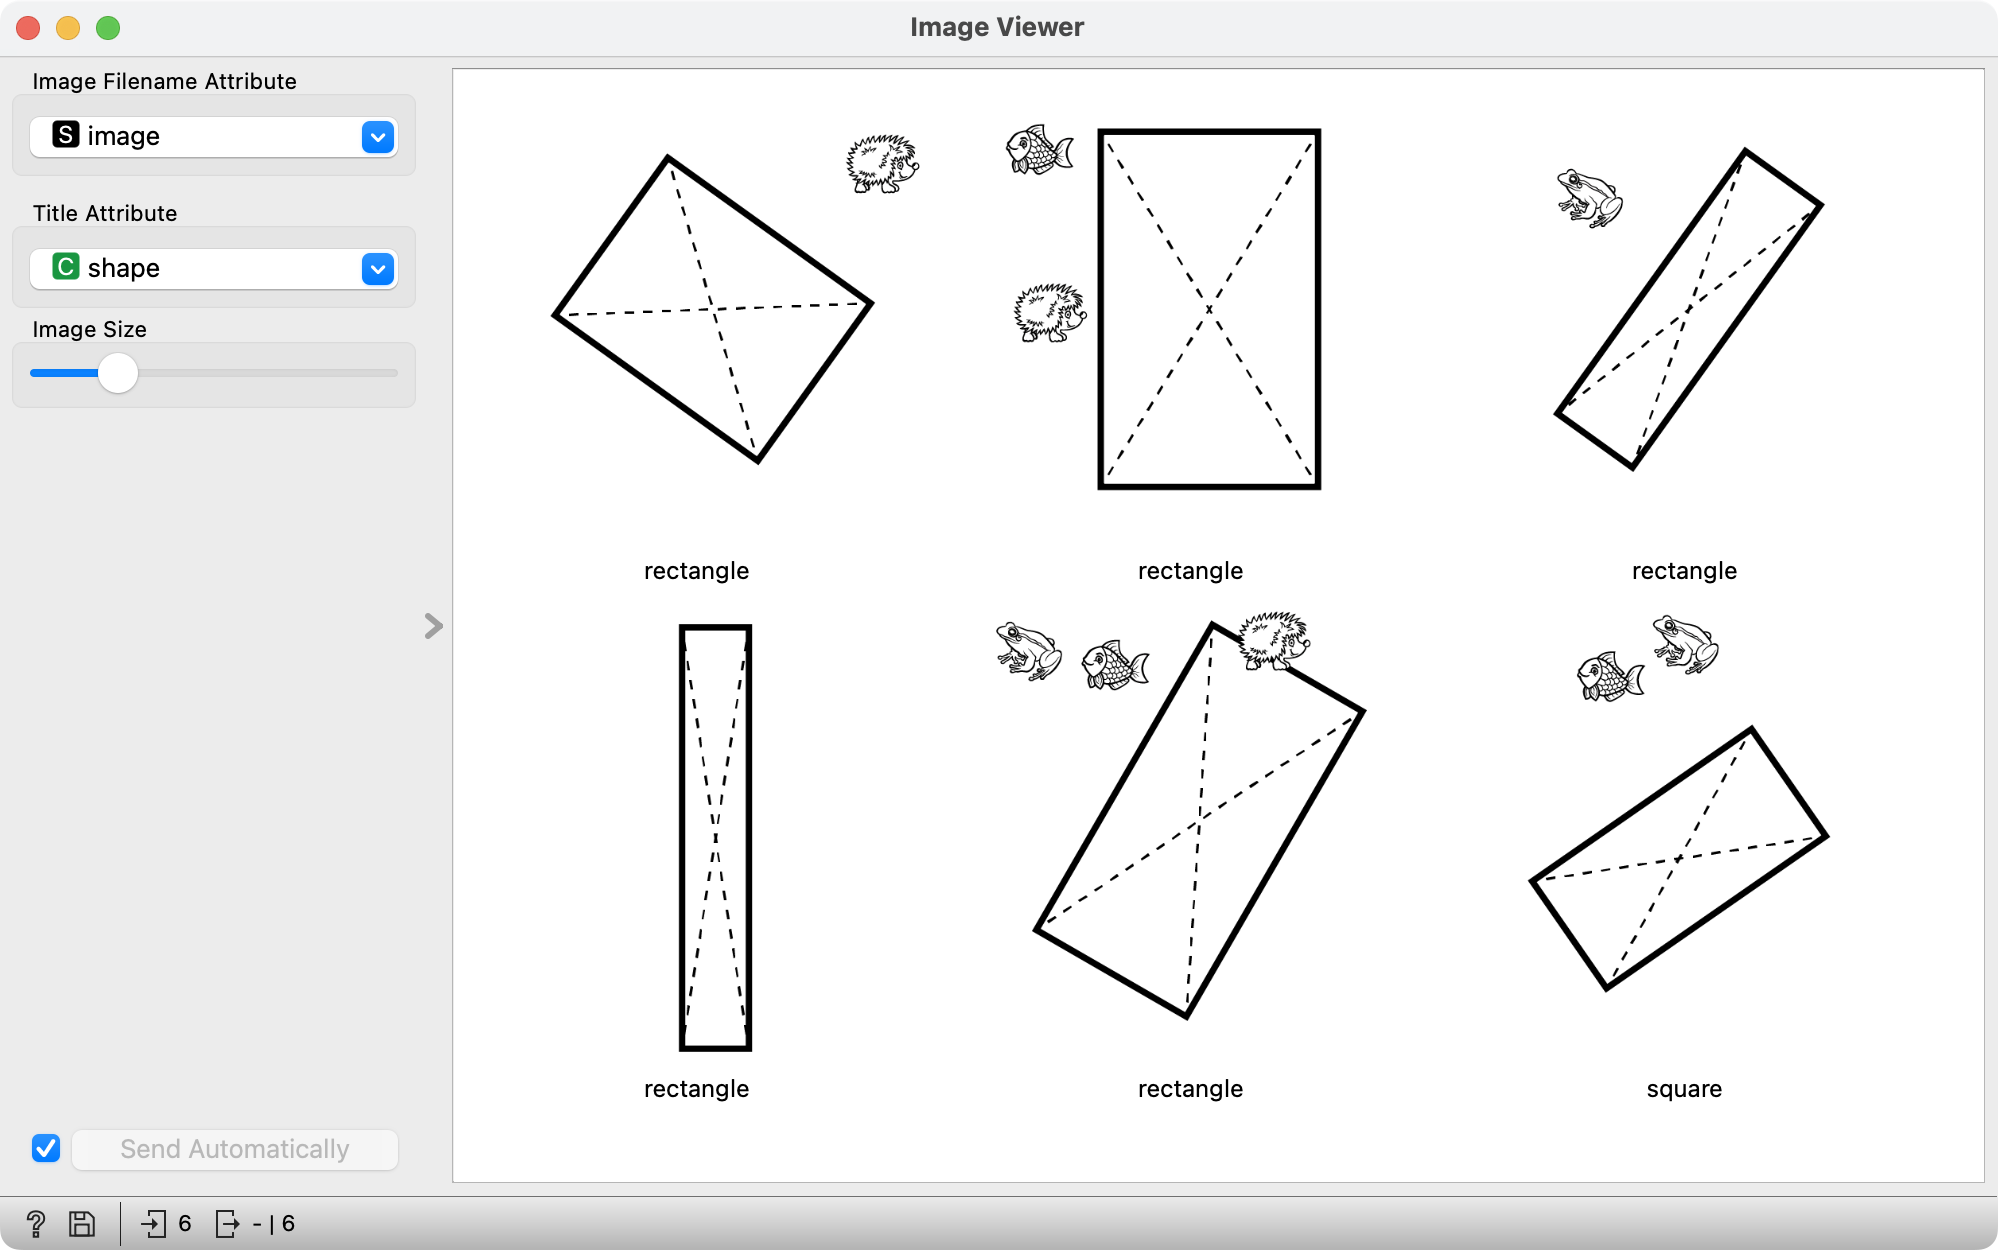
But can we figure out why the computer got it wrong? Let’s see. We connect the Tree Viewer widget to the Image Viewer widget and to the Table widget. In the tree, we click on »Leaf« –and see these six shapes in the Image Viewer:

Ah, makes sense! We can see that while the shape’s descriptions are accurate (otherwise they wouldn’t find themselves in the same tree leaf), one of the shapes is inaccurately labelled (classified) as a square. (Not that unusual actually; even adults often simply call a rectangle a square, as it is just … easier. )
Similarly, we can also have a look at other shapes. In some cases, the shape may be classified correctly, but its description might be wrong. This is most easily seen in the table.
Expanding the Activity: Unimportant Attributes
If, when creating the page, we decide to also include questions about animals that appear in the pictures, the corresponding answers will also be shown in the data table. Notably, the animals are distributed at random, in a way that carries no significant information; a hedgehog appears equally often next to each shape type.
If all the data is correct, the animals will not appear in the tree: neither hedgehogs nor fish or frogs can climb. In principle, machine learning algorithms can distinguish between important and unimportant, or useful and useless data.
If the data includes errors, however, the learning algorithm can find itself in front of two shapes, e.g. a parallelogram and a square (depending on the students’ classification of course!), with the exact same properties, except that one image also contains a frog, and the other doesn’t. In that case, the learning algorithm will most likely conclude that the presence of a frog is important for distinguishing between a square and a parallelogram…
In scientific language, this is called »Noise in Data,« or to put it simply: errors. We recognise errors because they are »unusual«: if we have six shapes with the same characteristics, among which there are five rhombuses and one kite, we can conclude that the rhombus has been misclassified, so we disregard it. If we don’t do that, we say that the model has adapted to the data too closely (overfitting). Protecting us against this are the very options we disabled earlier in the Tree widget. The reason we did that though was precisely because we wanted to see the errors.
Closing Discussion
When can we say that a machine or device is smart or intelligent? Is a smartphone really smart? Why? Because it reminds us of our friends’ birthdays – if we tell it about them first? Is this really »intelligence«? It is simply programmed to do that.
Can we say that a computer is intelligent, if it learns something it wasn’t able to do before? We saw how the computer has learned to distinguish between quadrilaterals – on its own, from examples. It is also interesting that it has discovered (unless misled by incorrect data) that the data about animals that was added to the worksheets was irrelevant.
Does that mean the computer did something that it wasn’t programmed to do? Yes and no. It wasn’t programmed to distinguish between shapes. It »programmed« itself. But it was programmed to learn – to »self-programme«. So then, is the computer intelligent or not? That depends on our perspective.
To wrap up the activity, we tell the students that nowadays prediction models are used practically everywhere. In medicine, for instance, the computer is shown many people with different symptoms and told which diseases these people have; in this way, it learns to identify diseases based on symptoms, just like it learned to identify different types of quadrilaterals based on their properties.
- Subject: Mathematics
- Duration: 1 hour
- Age: 6th or 7th Grade
- AI topic: Classification
- Author of idea: Anže Rozman
- Materials
- Preparation for the lesson
- Each group of students will need a tablet, phone, or a computer for data entry
- The teacher will need a computer with Orange Data Mining installed and the Image Analytics add-on
- Further explanation